Showing posts with label Food. Show all posts

Monday, September 19

Crock pot Beef and Beans

I meant to follow the directions but I forgot. Here is the original recipe. Below are my changes. 

INGREDIENTS

1/2 cup chopped onion
1 1/2 lbs ground chuck, browned and drained
6 medium potatoes, sliced or chunked
1 can beans, drained  or equivalent
1 can tomatoes mixed with 2 tbsp. flour 
salt and pepper
garlic

DIRECTIONS
Put chopped onion in the bottom of the slow cooker/Crock Pot; layer with browned ground beef, sliced potatoes, and beans. Spread tomatoes or soup over all. Sprinkle with seasonings as desired. Cover and cook on low for 7 to 9 hours.

Serves 4 to 6.
 
Like I said. I meant to follow the recipe. I used  1 lb beef. and about 1/3 of a huge onion.  Since I used home prepared dried beans I added Arizona Dreaming seasoning and salt too. I forgot to add the tomatoes. So we served this with your choice of salsa or leftover red enchilada sauce. I also love sour cream so that was on the table too.  My DH said he enjoyed it.

Monday, May 9

Parsnip Sweetie Sticks

I meant to by Turnips. I've never had, bought, or cooked either. So, i figured we'd try them. My DH is on a diet to lose some of the weight he's always had and some that he's gained slowly over the last four years.

Of this was borne the veggie of the week idea. Last week it was eggplant and cauliflower. I'll share those recipes later.

Parsnip Sweetie Sticks

Peel and cut parsnips. If using large ones cut out the woody centers.
Place in saute pan with melted butter and sprinkle with pepper and nutmeg.
Saute on low or medium low until soft and caramelized.

Wednesday, February 9

Make a roux- casserole makeover

If you ever cook from scratch, and I mean really from scratch - no cream of x soup or bisquick, you must be able to make a good roux. A good roux is the secret weapon of almost anything creamy. gravy, sauces, soups...

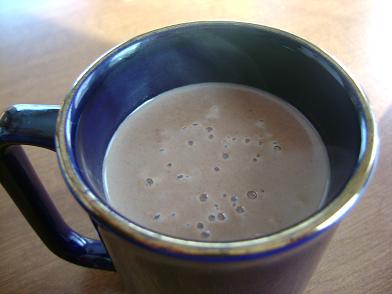
In case you don't know, a roux is a mixture of equal parts flour and fat. First you put the fat of your choice (butter or meat drippings work best) in a pan over heat until melted, hot and browned to the level you desire.  Secondly you slowly add the flour a little at a time while whisking. Picky cooks sift the flour first to "ensure" a smooth end product. Since I'm not that picky, I just whisk ferociously. After the flour and fat form a cohesive mixture slowly add in your liquid of choice, usually broth or milk. Again, add slowly, a little at a time whisking vigorously and checking for consistency.   Tada!

Anyway, this is an important element of my cream soup makeover dishes.  The hardest thing is the one can each of mushroom and chicken cream soups, but I found a solution!


Chicken and Rice Casserole
mushrooms diced (1 can of sliced canned or 4 fresh ones
*2+ Tbs rendered chicken fat (I used the stuff that was on my chicken broth after refrigerating it)
*2+ Tbs flour (white flour is best- one of the only uses for white flour in my house)
*1 1/4+ c chicken broth
*1 1/4+ c milk
*1/2+ tsp poultry seasoning
*salt and pepper to taste2 1/2 c cooked brown rice
6 hard boiled eggs diced
2 cans sliced water chestnuts
2 c cooked diced chicken
1c mayo (sour cream would work if you are opposed to mayo)
1/2-1 loaf crumbled bread
1/2 c (1 stick) melted butter (I usually skimp here.

1. Warm the chicken fat in a skillet while dicing mushrooms. Saute mushrooms in skillet for a while. Spoon out shrooms with a slotted spoon leaving as much fat as possible. Put shrooms in 9x13 or bowl. (I mix the ingredients in my 9x13- no need to dirty another dish. )
2. Make roux. Add stock first, then milk. when creamy gravy sauce thing reaches consistency add seasonings. Salt and pepper liberally since you aren't adding cream soups.
3. Mix rice, chicken, mayo, diced eggs, water chestnuts, and sauce in 9x13 with shrooms till thoroughly mixed.
4. While melting butter, crumble bread into a bowl. Pour butter over and toss till well coated. Pour over rest of casserole.- If you are lazy or don't have the bread, breadcrumbs will work in a pinch.
5. Bake at 350 degrees for 30 minutes or thoroughly warmed and bread is crisp.

Saturday, February 5

Cookies for Breakfast?

I saw this recipe at Heavenly Homemakers. It had to be worth a try. We are getting tired of chocolate chip banana muffins. (I never thought I'd say that but my DH pick up groceries for me - I know, he is wonderful- and succumbed to his craving for bagels leaving me to eat two dozen muffins. I should have brought them to school with me.)

If anyone ever wants to try a recipe but doesn't want to make it herself, give me a call. I'm forever looking for new nutritious things for breakfast for a hubby who eats while checking e-mail and weather then runs.

Breakfast cookies

1 c melted butter- olive oil worked just fine
1/2 c honey- reduced from 3/4c- they are sweet enough
2 eggs
1 t each salt, cinnamon, baking soda, and vanilla
1/2 c buttermilk or kefir
2 c flour
2 c rolled oats
1c rasins

Soaking- Mix oil, flour oats and buttermilk. Soak overnight then add the rest of the ingredients, mix thouroughly and bake.

Regular way-
Mix oil through buttermilk. Then mix in grains. Finally fold in raisins.  Scoop onto baking sheet in heaping tablespoonfuls. (I ending up with 14 cookies per batch. They are big but I wanted to be able to take just one for a snack. )Bake 350 for 15 minutes. (Don't over bake them. They start to taste burnt quickly and that is no good.) Cool on a rack for 3-4 minutes. . - Seriously, they are really really hot.

Next I want to try cupcake quiche- maybe I can use wonton wrappers.

Thursday, February 3

Biscuits and Gravy

Yesterday was a snow day.  Even Justin was stuck out home most of the morning. It took him two hours to shovel out our driveway. We don't have a long driveway.  One of the drifts was almost up to my waist.
 On a day like that, what sounds better than comfort food? So we made Justin's favorite breakfast- Biscuits and Gravy. From scratch of course.

We've been searching for a good recipie for both biscuits and sausage gravy for a while. We finally found both. On the same website.

However, before I give you the recipe I have one more hint. If you have a little one at your house who demands attention when you are trying to prepare supper, prepare as much as you can when they are happy to play by themselves or during nap time. For me that meant making the biscuits and refrigerating them and making the roux. Or if you don't to make the biscuits completely, mix the dry ingredients, cut in the butter and refrigerate that.

Without further ado, Biscuits and Gravy via  Mark Vogel


BISCUITS AND GRAVY RECIPE
    For the biscuits: • 2 cups all purpose flour • 4 teaspoons baking powder • ¼ teaspoon baking soda • pinch of salt • 3 oz. cold butter, diced • 8 oz buttermilk
Combine and sift the dry ingredients. Gently knead in the butter.  Add the buttermilk and knead on a floured board just enough to bring the dough together.

It is vital that you knead gently and no more than is necessary or you will develop the gluten in the flour and make the biscuits tough. Good biscuits are as much a function of technique as ingredients.

Form a flat mass with the dough and cut out biscuits with a biscuit cutter.  Don’t make them too high or the outside could become over browned by the time the inside is cooked.

Place them on parchment paper on a sheet tray and then into a preheated 400-degree oven.
Start the gravy immediately. It should be done close to the same time as the biscuits, which is when they are golden in color.
    For the gravy:• ½ pound ground breakfast sausage. • 2 tablespoons butter • 4 tablespoons all purpose flour • 3 cups cold milk • Salt and pepper to taste
Sauté the sausage until it is cooked and has released as much of its fat as possible.  Remove the sausage with a slotted spoon and do NOT drain the grease. You’ll need it to make the roux. (I said this was delicious, not health food).

You should have about 2 tablespoons of rendered pork fat.  Add the butter and melt it.  Then add the flour a little at a time over medium heat, constantly whisking.  Cook for about 2-3 minutes. Now start adding the cold milk a little at a time, whisking incessantly.  Toward the end of the milk add the sausage back in. When you reach the desired consistency add salt and pepper to taste.
Cut the biscuits in half, pour the gravy over them, and enjoy one of the most embracing and comforting taste sensations known to man.

     A few points here.  The perfect roux has equal amounts of fat and flour.  If for some reason your sausage renders noticeably less or more than two tablespoons of fat, adjust the amount of flour accordingly. If you end up making more roux you will need more milk so have extra on hand.  Make sure the roux is cooked on no more than medium heat. We do not want to burn or brown the roux, just cook out the floury taste. Four things are necessary to assure a smooth, lump-free gravy. You must constantly whisk the roux and the gravy throughout the process.  You must add cold milk to the hot roux.  You must incorporate the milk a little at a time. And finally, keep the heat at no more than medium. You can adjust the consistency however you like, but a thick creamy gravy is the target viscosity.

Sunday, October 31

Dutch Potatoes -ie Stamppot

Ingredients:

  • 3 lbs potatoes
  • 2 onions chopped or diced
  • 1 bay leaf
  • 1 lb kale or spinach roughly chopped 
  • 1 pinch salt
  • 1 pinch ground pepper
  • 1 lb smoked sausage or ring balogna
  • 1/2 cup milk
  • 2 tablespoons butter
  • brown gravy
Directions:

  1. Peel and dice potatoes and onions.
  2. Clean, trim and slice kale. (omit if using spinach)
  3. Add the potatoes, onion, kale, a bay leaf, a pinch of salt and just enough water to cover all in a 3 qrt pan.
  4. Cover and boil gently for about 25 minutes. (Add the spinach for the last 5 minutes.)
  5. Meanwhile steam the smoked sausage for the same amount of time and slice or skin and add to the potato mixture.
  6. Remove the bay leaf, drain the vegetables, (and meat), and mash them.
  7. Add milk and butter.
  8. Stir in the hot, sliced smoked sausage, add salt and pepper to taste and serve.
  9. Serve with brown gravy.

Tuesday, October 19

Never- fail biscuits (aluminum free too)

 My DH and I love biscuits, especially with sausage gravy. However, I refuse to buy him poison-in-a-tube often know as Pillsbury (or store brand knock-offs). At first, my biscuits were hardly passable, particularly when made with whole wheat. Then I discovered this recipe. I modified it to fit my standards. It is WONDERFUL! Never-fail.


• 2 cups whole wheat pastry flour - or any flour combo you have.
• 3/4 teaspoons cream of tartar - this and extra baking soda eliminates the need for baking powder
• 3/ 4 teaspoon baking soda
• pinch of salt
• 3 oz. cold butter, diced (6 tablespoons)
• 1 c kefir or buttermilk- This is vital!

Combine and sift the dry ingredients. Cut in the butter.  Add the kefir 3/4 cup first and the rest as needed (not dry but not too wet to spread out either) and mix until the mixture just comes together. If needed, dump it onto a well- floured counter and kneed gently and knead on a floured board just enough to bring the dough together.

It is vital that you mix/knead gently and no more than is necessary or you will develop the gluten in the flour and make the biscuits tough. Good biscuits are as much a function of technique as ingredients.

Form a flat mass with the dough and cut out biscuits with a biscuit cutter. Press straight down, down spin the cutter.  Don't make them too high or the outside could become over browned by the time the inside is cooked.

Place them on parchment paper lined or oiled sheet tray and then into a preheated 400-degree oven.

Take them out when golden brown.


* Last night I made Bubble-up Pizza (casserole) I made these biscuits (they were a bit wet), poured them into my 9x13 pan and pre-baked them. Then I added my sauce, beef and cheese and finished baking it. it turned out better than I remember Bubble-up Pizza!

Thursday, October 14

Warm Chocolate soother

This morning was pretty chilly. it didn't help that we left one of our windows open. It wasn't too chilly, just enough that you wanted to snuggle up in a blanket with a warm beverage.

Today, as most days, my breakfast was in shifts. of course, some of you consider a piece of toast with peanut butter and jam to be breakfast. I don't. I think of it as part of a breakfast. As forementioned, this mornign was a perfect morning for hot chocolate. But, that is not a decent breakfast. First of all becauseof the sugar. Second because of the other ingredients and third because it lacks the protein and fat that I need to make it to lunch.
I was pondering what to do when I remembered the warm vanilla soother from Laura at Heavenly Homemakers and that she had mentioned that she had a chocolate version too.
As claimed, it tastes like what you would imagine to be a warm liquid brownie.


Warm Chocolate Soother
3 cups whole milk
4 egg yolks
1/4 cup real maple syrup
3 T. sucanat
1/4 cup cocoa powder
2 T. arrowroot powder or corn starch
1 Tablespoon butter
1 teaspoon vanilla extract
In a medium saucepan, whisk together milk, egg yolks, maple syrup, sucanat, cocoa and arrowroot powder.  Cook over medium heat, stirring constantly (I use a whisk) until mixture begins to thicken.  Remove from heat and add butter and vanilla.  Stir until creamy.  Pour into mugs and serve warm.

Saturday, October 9

Banana cake

I modified this a bit to make it more of a snack or breakfast cake but will include the original instructions in parenthesis so you know how it was intended for a dessert cake.

2 1/2 c flour - i always use whole wheat - white whole wheat worked really well. -none knew
1 c sugar (1 2/3 c)
1 1/4 t baking soda
1 1/4 t baking powder [1t soda + 2t cream of tarter = 1 T baking  powder]
1 t salt

2/3 c butter or coconut oil - NEVER USE MARGARINE OR SHORTENING!!
1/3 c butter milk or kefir
3 mashed over ripe bananas or 1 1/4 c

1/3 c buttermilk or kefir- yes another
1/2 c or 2 large unbeaten eggs or 3 medium
Optional 2/3 c copped nuts or chocolate chips

*Preheat oven to 350
1. Mix first 5 ingredients.
2. Add next e and beat vigorously for 2 minutes in mixer
3. Add remander or milk and eggs. Beat for 2 more minutes.
4. Fold in add-ins if you choose
5. Bake for 18-20 minutes using 2 9" rounds, 11x16 or cupcakes/ muffins.

Dessert cake may be frosted with icing (suggested in my book) or chocolate frosting (my idea).

Zucchini bread

Zucchini bread
3 c flour
2 c sugar
1 c oil
4 large eggs
1 t cinnamon
1 t nutmeg
1/2 t cloves
1 t baking soda
1/2 t baking poweder (1 sprinkle soda and 2 sprinkes of cream of tarter)
2T vanilla
2 C finely grated Zucchini

Mix in order and bake at 325 for an hour or less time if you do it in muffin tins or bars. Then use the tooth pick test and good sense.

Wednesday, October 6

Busy Busy

Tasty bread. Don't they look beautiful!

Shredded zucchini- only one. I have about 10-15 cups left that I need to freeze.

Dehydrated bananas since they were on sale. 29c/lb. Making chips for snacks.


Baked a spaghetti squash. 

Made this lasagna with it using our normal but replacing lasagna noodles with squash.
Home made hasbrowns. Grated rinsed and boiled these nest time I'll try bake and grate.

 These were tasty! We have baked taters in the fridge waiting to make more hashbrowns.

Dehydrated cherry tomatoes. They worked well in my tomato soup to absorb extra liquid.

Learned that crumbling cheese is less labor intensive than shredding.
I also learned that you use a bit more this way and it is LOUD.


Dried tomatoes ready to store.

Basket of snacks- zucchini bread and granola- ready to freeze.

Frozen banana read to thaw for banana bread. Got too ripe before I could dry it.

Banana pancakes. Great with peanut butter!

Breakfast pockets for on the go Hubby.
 I'll try to update with recipes tomorrow.
Hat for my little J to keep his ears warm. Going to try one with ear flaps.

Wednesday, September 15

BLT Pasta

YUM!!

This is not my picture. My dish was different. It did not have croutons or lettuce, spinach, endive, or other such things.


Here is what I put in mine:

Brown rice pasta (gluten free)
cherry tomatoes
zucchini 1/2 a medium
bacon
bread crumbs
peppers (banana and jalapeno)
Parmesan cheese

First slice the tomatoes in half, roughly chop the peppers, and cut the zucchini into  slices and them each slice into quarters or sixths. place them on a nonstick pan and broil them. Watch them so they don't burn.

Next start the pasta. If you are using spagetti squash you can omit this.

Fry the bacon and set aside. Chop once cool.

Get the veggies out of  the oven. (I think that red onion might be good in this too.)

Fry the bread crumbs in the bacon grease.

Drain the pasta.

Add all ingredients together and toss. Don't forget the Parmesan. If  you didn't use spicy peppers add black pepper or red pepper flakes.

Enjoy!

Sunday, June 6

Pretzels

I've now tried making pretzels twice, well three times really. It went much better the last time I did it.
I discovered the key to boiling pretzels!! This is a bigger deal than you think. If boiling does not go well, it makes the entire experience frustrating. The water gets nasty. It is really hot.  The pretzels fall apart. They don't cooperate in general. They start to look bad and get water logged.

Boiling is the key to a chewy outside and soft inside, which my DH says is one of the most important pretzel components. The secret: boiling is not the key, water at boiling temperature is. The boil needs to be amazingly gentle. It can't disturb the waterlogged developing crust. You also have to leave the pretzels in long enough that they begin to form a crust. In the picture here, the water is boiling far too rapidly. In my final batch it hardly bubbled. At all, as a result, when I finished, the water was still clear and all of the pretzels turned out well. In the batch boiled in this water, only 3 turned out well, they went down hill very quickly after that.
I got the recipe from Laura at Heavenly Homemakers. She doesn't boil hers. I think that this makes them taste like bread, not pretzels.

I also decide how many to make by how easy it is to cut the dough. He recipe gave me 16. (I did 16 because I could half the dough each time. )I liked the size of a pretzels.

Between batches I froze the pretzels and then let them thaw in order to keep them from rising.
I also rolled mine out to 24-26 inches before shaping.  Getting ready to start. I also laid out all my supplies and greased my pans.

Tuesday, June 1

Deep dish pizza

I did a lot of baking this holiday weekend.  We made deep dish pizza for the first time, soft pretzels (totally SAD), and Chocolate Chocolate Chip Somethings. The pizza was a great hit. The pretzels were hit and miss. The CCC Somethings were alright. First the pizza. I will tell you about the other two another time.

 My wonderful DH and I LOVE deep dish pizza. Golden nearly fried edges, thick sauce, stringy cheese,  and plenty of toppings. When we make a pizza for the two of us, there should be leftovers because a few pieces are that filling. We've tried a couple different things. I even contemplated stealing a deep dish pan from a local pizzeria because I finally found one in a store an hour and a half from home and it was too pricey for me buy. (I decided that would not be Christ- like behavior.)

We usually bake our pizza on a stone and that is one of the things that does work really well. Getting pizza out of a stone casserole dish was not something that I was willing to try. Our pizza stone is very used and a wet dough will still stick to it occasionally. The casserole dish is not so ... broken in.
Finally, after wracking my brain, I was inspired to try a spring form pan. I had my doubts. Oil seems to have the amazing capacity to work its way out of anything {time to make a prediction- will it contain everything or no?}.  But we'd give it a go.

We (I) did not go into to this attempt willy-nilly. I have been studying and researching deep dish for a while. I also have worked at a pizzeria and have unveiled a few tricks of the trade. (Unfortunately the pan is one.)  Another is an very long cool double rise. We didn't have that much time, nor do I have a walk in cooler (or refrigerator space) to refrigerate a spring-form pan on a level surface on a regular basis. So we have to make due.

I did use my regular pizza dough recipe, with a few changes. I used half and half white whole wheat. I wanted it to turn out and simply put, white flour is more lenient. I also refrained from soaking the dough. Hopefully through trial I can bring back soaking and whole wheat and still have a fantastic deep dish product.

Step 1 I made the dough. Step 2- left in on the counter to rise till double(ish) then I put it in the fridge. If I had started the dough in the morning or even before lunch I could have let the dough rise in the fridge entirely. I will likely make this alternation next time (just one alteration at a time for scientific purposes). We didn't start dough till 3:00 so I didn't want to risk the slow rise.

Step 3- oil pan and roll out dough. I rolled the dough out till it was just bigger than the pan then gently placed the dough in the pan. I continued to press it out until there was a little lip . Step 4- leave the dough on the counter and go to church. (Picture below is when we got back just before pre-baking. You can see that it did leak.)

Step 5- put the stone in the oven and preheat both to 450 degrees. Step 6- prebake the crust for 5 minutes or so. I did this because Baking in my oven is slower than in a pizzaria oven. I didn't want to loose all the beautiful rise by piling on the toppings to and unsupportable weight. (As previously stated we like lots of toppings.) Step 6 take crust out and top quickly before popping it back in.
Step 7- I did take the pizza out when it was almost done. i decided to take off the edge of the pan to let the exterior crust brown. I learned to be careful to make sure that the crust is not stuck to the edge or you will start to rip open the pizza. Step 8- put the pizza back till the cheese begins to become golden (or other cues).

Step 9- take out pizza. If you can wait it is best to let it sit for a couple minutes so that when you cut it the toppings and cheese cut. This allows them to stay on top of the pizza rather than to be caught up with the cutter and be forced into the new cut.

Step 10- Serve with pizza sprinkles and Parmesan cheese and delight in your homemade deep dish.

Wednesday, May 26

Ranch Dressing

Ever since I first tried Ranch dressing years ago, I've been hooked. For a while I was ashamed of myself, silly I know, but I was already aware that normal Ranch was not exactly a healthy or health building food. I've tried to avoid it, but yum.

My second choice has been Western. That cannot be much if any better since the first ingredient is high fructose corn syrup which I've been trying to eliminate from my diet.

I've been having a similar struggle with Mayo. I'm a big mayo fan. (This is relevant.)

Most people don't know it, but I'm a bit lazy. Unless I find the difficult way intriguing and I have that much time and energy, I'm doing it the easy way.

So I found this place I love called Penzey's Spices. (They have arrowroot powder among other things.) Not everything there is totally great [like the soup bases :( ] but most of it is wonderful. While there I got taco seasoning and :D buttermilk ranch dressing mix. Yeah! But still, it calls for mayo.

This past week, I finally got around to making my own mayo. I was intrigued when I heard about it and fascinated when I saw a video blog which I would link to but I lost it.  Eggs have also become readily available as it is nearly June. That was a big factor.  It was easy if you remember to you the mixer not the food processor. Our food processor makes it impossible to add things while running and that is way to time consuming! Note- I've not tried my mayo plain yet.

I have tried the Ranch. Since the dressing is liquidy, I need to add more mayo. That I can do. It is not the same thing as Hidden Valley, but it is Ranch. :D. Yeah!! I'll attach a picture when I load pictures next.

Sunday, May 2

Food Pyramid

As a teacher, especially one that teaches science to two classes of students at different grade levels and as a person who is passionate about real food, I really struggle with how to teach health and nutrition. Our curriculum uses the USDA approved guidelines which are wrong.

I seek to teach from and with a strong Christian perspective in all my classes. I have quite a few students whose families have slowly started food conversions but don't always have access to quality information. However, most of my students eat SAD.

(In case you are wondering how real food and christian perspective connect,  God create food for us to eat that is healthy for us. He create food for animals to eat that is healthy for them. When we stop trusting him and decide to re-engeneer things oursleves, taking away the God given healthy way of dooing things, how can anything but something inferior result? We sin against God saying that we are smarter than He is.  We sin against God saying that we can create better than He can. We sin against God by denying his creation the life God intended for them and denying them to express the characteristics he gave them.  If history and science teach us anything, it is that the more we try to control things apart from God, the worse things get. )

I have a lot of leeway, but no matter what I teach in health and nutrition, I'm just not sure. The more I learn the more I lean towards the truth, especially with my older students. I figure, if they do go home and talk about science/ health class, at least I have opened a door to the truth, at the worst, I get reprimanded for not teaching the curriculum.

Here is a great post about a REAL FOOD pyramid.

God's real food gives me a reason to be passionate about food.

Tuesday, April 13

Sourdough Waffels

About three weeks ago I traded for a sourdough starter. I've been wanting to try sourdough pizzadough and waffels. I'f fed the starter on Saturdays. I've kept it in the fridge other than that. I was worried that it wouldn;t work, and the pizza dough didn't. Then again, I didn't really use a recipe.

Don't get me wrong, I liked the pizza dough. It was just really flat. The DH didn't like that. So we disagree, that means I'll do my homework, find a recipe and try again in a while.

The WAFFLES oh the waffles. They did turn out. I did follow the recipe and it was amazing. They were definitely still whole wheat and needed fruit and maybe even whipped cream. OOHH! That'd be good.  (By the way, the obsession with food is NOT pregnancy related. I just have an excuse to be more verbal about it.)
The recipe is form King Arthur Flour. It is truly amazing. The batter DOES start to bubble when you put the eggs in. It is amazing. I was afraid that string it to combine, which I needed to do aggressively, would be a problem, but it continued to bubble through the second waffle. The batter only made two Belgian waffles, but they were perfect. Here is the link

Friday, April 2

Bottling Kefir "Pop"

I've decided that I really like kefir. Both milk and water kefir. I have to be more careful with milk kefir because it becomes sour much more quickly than water kefir does. But it does make a good tangy drink. I've been adding fruit to mine to make it more palatable and it will be a while before I even try to give any to my DH. However, when it is too sour for me to drink, I use it for soaking. I love it when healthy things have more than one use!

- Side question- Could I use water kefir to soak things? Is it as helpful digestive as milk kefir? Is it as healthful?

Moving on, I love water kefir, it is really tolerant of things that you do- like forget it for a while. Lately I've been distracted by school and baby stuff so cultures and kitchen have been on hold for a while. My water kefir is so fogiving as long as i refrigerate it.
I recently took a batch of kefir juice to two different parties. It was a big hit at both where plenty of people (and kids) at the combination of the too who eat Standard American Diet. At one party I brought the Kefir (Raspberry Apple) in a 1/2 gallon mason jar, but to the other I contained it in a pitcher. For my own use I have decided that if I can, I like to put it into screw-top glass soda bottles.  (I prefer these because they fit on the kitchen shelf with my glasses.) I use a funnel to get the kefir in once it is mixed. After which I cap them, often using a towel to hold tight. Then, I leave them on my counter top for about a day (when it is cold in the house sometimes it goes two). I like to do a two part kefir to one part juice ratio for most juices. This also enables the kefir to eat the juice's sugars without making it too tart. They do become carbonated, so I always open them over the sink if they have been sitting for more than a day. I have not taken enough notes to find out exactly what time and ratio and whatnot equals what result (note that Kelly suggests 18 hrs), I also try to store them in the cardboard carrier. They do start to hiss if they are ultra-ultra carbonated, which is a serious warning to let out some "steam" and refrigerate them immediately if they are capped properly. This I know from experience because one exploded on me. The picture above shows what happened to the bottle. Since it was in a carrier, there was no glass anywhere else, the kefir created a little sticky mess, but significantly less than I anticipated when I discovered the explosion which occurred while the house was unoccupied. 

Let it be noted that I have found a new favorite mixture- Strawberry Lemonade! I love real strawberry lemonade which is nigh impossible to get anymore. (Though really Applebees does have a version that I enjoy). I avoid lemonade when we do go out because usually it is powdered junk full of imitation flavored high fructose corn syrup.  Sadly, lately I have been craving some. (That and I am too cheap to buy lemons). Though this is not quite the quality of my dad's really strawberry lemonade [made with 1 cup freshly juiced (not crushed) local lemons (usually thawed from when we home froze it), 1 cup white sugar, 1 gallon water, and crushed and sugared fresh strawberries].  This is pretty good. It is dark since I tried the kefir with rapadura instead of evaporated can juice. It has (when the quart was about full) roughly a quarter cup of lemon juice (I didn't measure I poured and tasted) and cut strawberries in their juice (thawed from this summer when I cut and froze them). I think that it will taste better with kefir made from cane juice so I did half and half for the batch that I will be making tonight or tomorrow morning. You can see the strawberries in the jar on the left which I used for a glass. One of the best parts was eating the strawberries when the juice was gone. It was fantastic.
[By the way Mom, this is really easy. I'm hopping that when you visit you can make kefir if I am incapable. It will be on preferred help list.]
 If you are wondering about why or the safety of this venture, check out Kelly the Kitchen Kop's posts on kefir. She is the one who got me started. By clicking on her name you can see the post about how the amount of alcohol that the product contains is extremely negligible. 
Have a blessed Good Friday and Easter!

Friday, March 19

Milk Kefir

Last week I traded some of my water kefir grains for milk kefir. Though I'm not sure that grains is an accurate name or description for either one. First of all they aren't really grains. They are living, breathing, eating,  hopefully reproducing living organisms that ferment something and in the process carbonate it and make it an ultra-digestible, disease-fighting pro-biotic beverage.  Really, water kefir grains look like the "grains" of silicone that come in shoe boxes after they have absorbed a bunch of water, except the kefir can become larger, (the size of a pea). Milk kefir grains look like cauliflower. Yes, they really do. The only difference is that they are more milky-translucent than the dull white tinge of cauliflower and they have a slight gel-like appearance.

But, Today is the day! Admittedly I'm a litter nervous. Really I shouldn't be because I have tried plenty of other weird/ kookie/ hippie/ "crunchy" things before. Seriously now, I make and eat my own yogurt and keifir pop, and will eat home canned fruit that has that "this-has-begun-to-ferment" tingle to it.  (No lectures please. Baby and I are healthier than plenty if not most pregnant women I know who eat the Standard American Diet. Beside, I'll just ignore you the way I learned to when I was a teenager, except my pregnant self will try not to be annoyed and not to hold a grudge.)

So here it goes!

Batch 1 tastes ... tart and sour, which is perfectly acceptable. Tarter than I'd like at this point. Plus it is seperating a little and I don't rally like that texture. (I hope that this problem is not specific to fresh milk.)  I'll either get out some fruit to add and maybe a bit of stevia or I'll use it for baking.

Batch 2 is made from AE whole milk. It tastes ... Like thin plain yogurt: tart, but not overly so. Rather smooth. I stil think that I'd like to doctor it up for a bit. So that it is more of a drinkable thick beverage than a sippable one. Since I keep sipping at it I know that I find it appealing and will get used to the tartness.

Yeah!

By the way Mom, I hope that you are reading all the posts about cultures, because you may be taking care of them while I rest after Baby comes. If I end up taking antibiotics I will be requesting them in an effort to undo all the negative effects of the antibiotics.

Saturday, February 6

Kefir and bread failure redeemed

Kitchen update
I do most of my baking and special things on the weekend. Since I don't get home on most weekdays till 6 and then we make food and eat til 7 or later, that doesn't leave enough time for some things. I still do kefir during the week and I soak rice and oatmeal during the week. On the other hand,  yogurt, baking, and other experiments are done only on weekends (or snow days). This picture is of by kefir fermenting.  I keep it in a 1/2 gallon or quart jar. I now use cheesecloth on top so air can get in but other things can't. Also, this way I can pour out the kefir leaving the grains in the jar. I can also pour new sugar water in through the cloth so that I don't have to worry about loosing anything! Yeah!

On another note, I baked buns last weekend (bread this weekend) I had a little bit of dough left, yet my pans were full. I decided to try clover rolls. They over baked. Then, I forgot to bag them, and they became even harder. Needless to say,  they were basically unedible. (Well, I could have steamed them.) However, I recently picked up some fish fillets with the intention of making fish sticks. (Unfortunately VandeKamps has ingredients on my list of "non-food 'food' products.") Asi es la vida. So... redemption. Finally soaked whole weat breadcrumbs! I smashed and pulled the rolls apart, left them on the counter on an old cereal bag that I saved, will roll them into crumbs, and store them in a jar. Yeah! If I have extras then I can use them in meatballs, meatloaf, or burgers.